When I transitioned from portrait to landscape photography last year, I spent a lot of time trying to figure out a system that would allow me to capture everything I wanted correctly, but also keep the weight of my bag down so I could hike long distances quickly in order to make sunsets/sunrises in time.
After a year of buying and returning a lot of gear before finally finding a combination that worked for me, I’ve decided to share this post for anyone who’s also getting into landscape photography, and because I’m curious to know what has worked for everyone else!
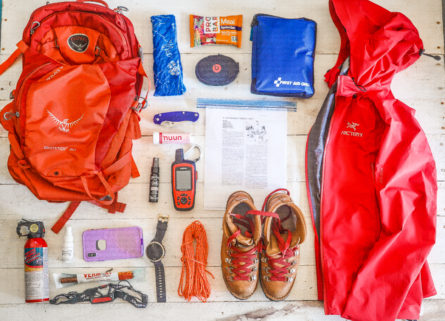
All the things I carry…


My backpacking system
Backpack
I owned a 36L Osprey Skimmer and 49L Arcteryx Bora before I decided to invest in a 60L Shimoda Explorer backpack. I made the switch because I needed a backpack that not only organized and protected my camera equipment, but also allowed me to access all of it a lot faster. It comes with a customizable and structured packing system that houses my lenses, camera and accessories safely; and I love that it’s designed to let me access everything quickly by either unzipping the sides of my backpack, or just setting it down and unzipping the entire backside to get to my packing cubes. Each packing cube also comes with a waterproof case that zips shut, which keeps everything dry in the worst case scenario (like if it fell in a lake, or you ran into powerful wind and rain) With other well-known camera backpacking systems like Lowerpro, Peak Design and F-stop, I chose Shimoda because their backpacks were built to protect camera equipment through fast-paced outdoor adventuring (like snowboarding and biking), so they’re made with light material… and also because I have a soft spot for startups :). So far, it has survived through almost 200mi of hiking through Banff, Patagonia, the PNW and Shenandoah Valley with only a few holes and tears I’ve been able to quickly patch up with Gear Aid tape.
Side note: I know 60L is a little big for day hikes, but I bought it so I could do both day and overnight hikes with it. Shimoda also has a smaller 40L version if you don’t carry as much gear as I do.
Rain cover
You never know what the weather is going to be like wherever you hike, so for the same reason I bring my Rain Jacket (Arcteryx Beta SL jacket) everywhere, I bring a rain cover for my backpack to keep my equipment dry in case the weather turns.
Accessories case
I use different filters for my lenses depending on the time of day and how sunny it is, so I use the Shimoda Accessory Case to store my lenses and microfiber cleaning cloths.


My camera & lenses
Full frame DSLR camera body
My first camera was a little Canon Rebel XTI (cropped sensor DSLR) that I bought in 2008 for a photography class I took in college. With a few prime portrait lenses, this baby got me through years of paid food, restaurant and portrait shoots; but when I switched to landscape–I realized quickly that I’d need to upgrade to a Full Frame system to get the best use of my lenses. There are also a lot of features I knew I needed in a better system to give my photos the “edge” I was looking for in my landscape photos, which I’ll get into in a different post. For those reasons, I’ve been shooting with the Canon 5D Mark IV the past year.
Wide angle lens
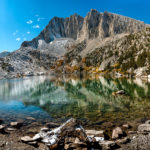
I use my wide angle for night photography, and often use it when I want to capture a large amount of space in one photo (like Little Lakes Valley; left), and don’t necessarily need the depth of having various focal points that I’d get if I stitched together dozens of photos to create a panorama instead. My wide angle of choice is the Tamron 10-24mm 3.5, a lens I used 80% of the time I was out in Banff. I still bring this lens with me everywhere, because it’s easy to use, is incredibly sharp and captured some of my favorite images in the beginning of my career; but lately I’ve been using my zoom lens on longer hikes, because of its versatility.
Zoom lens
I’ve been using my Canon 24-70mm 2.8 L the most lately, because it’s both a wide angle and portrait lens, making it the most versatile lens I own. For that reason, I always have this setup with my camera on my hip when I hike in case I want to take a quick snap of something I didn’t expect to see. Being able to dial down to 24 allows me to get a lot in one image, and being able to crank it up to 70mm at 2.8 allows me to create a lot of depth in a photo of a subject that’s close by (like a person or animal). I used this lens the most while I was out hiking in Patagonia.
Portrait lens
My oldest pair of prime portrait lenses, the Canon 35mm 1.4 and my old Canon 50mm 1.4 (which I recently sold, and already miss terribly) were the lenses I used the most when I did more portrait photography with food and people.
When I switched to landscape, I decided to keep only one fixed portrait lens and sold my 50mm, because I felt my 35mm would be more versatile as both a semi-wide and portrait lens I could use on quick trips where I only wanted to bring one lens. I also use it to create panoramas, and exclusively use it to create focus stacks, because of its ability to dial down to 1.4 (aperture), which allows me to create photos with lots of depth and multiple focus points.
If you want to create even more depth in your photos and have the budget, you could check out the Canon 35mm 1.2 L for an even lower aperture level.

Telephoto zoom lens
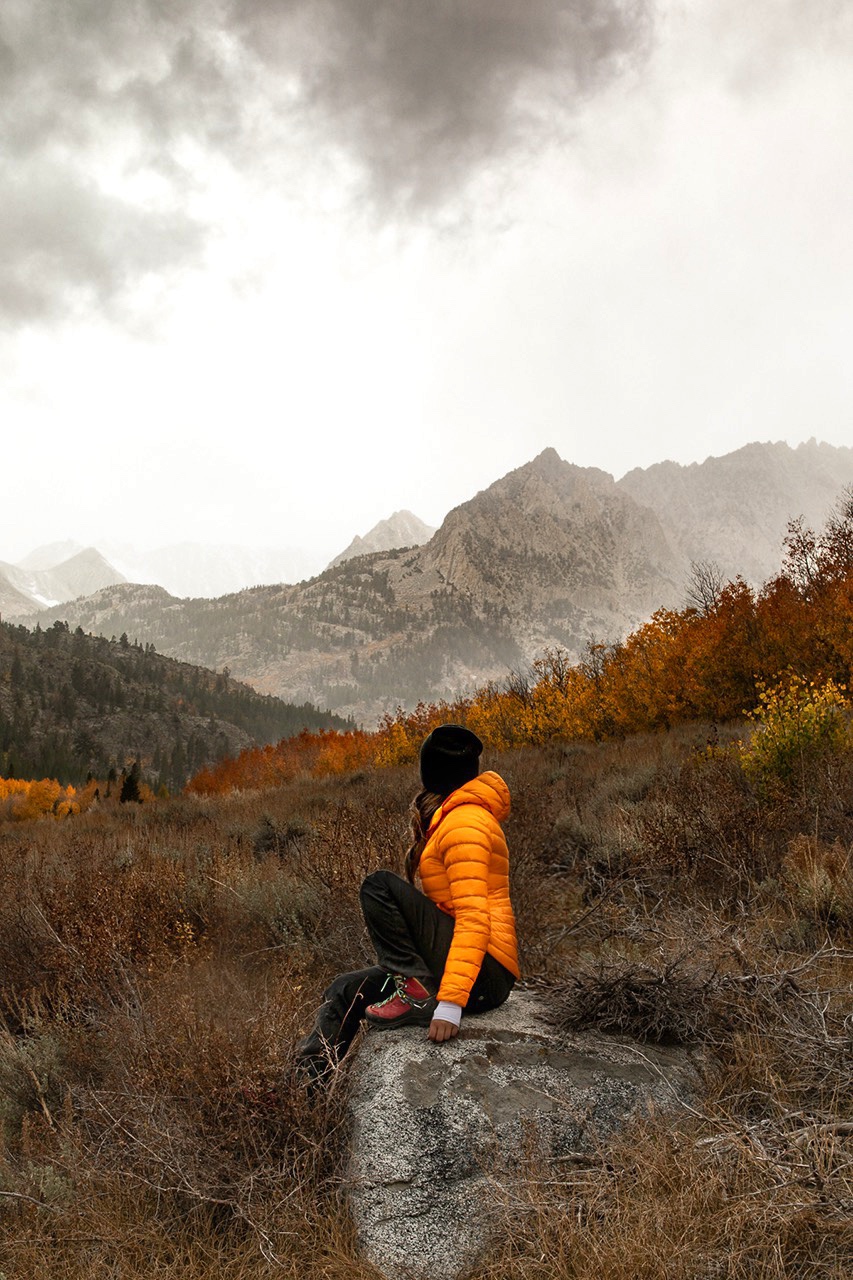
My telephoto zoom lens is enormous (Canon 100-400mm 4.5 L lens), so I really have to be on a mission to get wildlife photos to bring it backpacking. I love bringing it on day trips though, because it’s ability to zoom in far allows me to keep a safe distance from an animal and snap a photo of it without scaring it away.
It also scrunches so much space into one image, that it can create a ton of depth and brings a lot of focus to the subject like the one to the left.


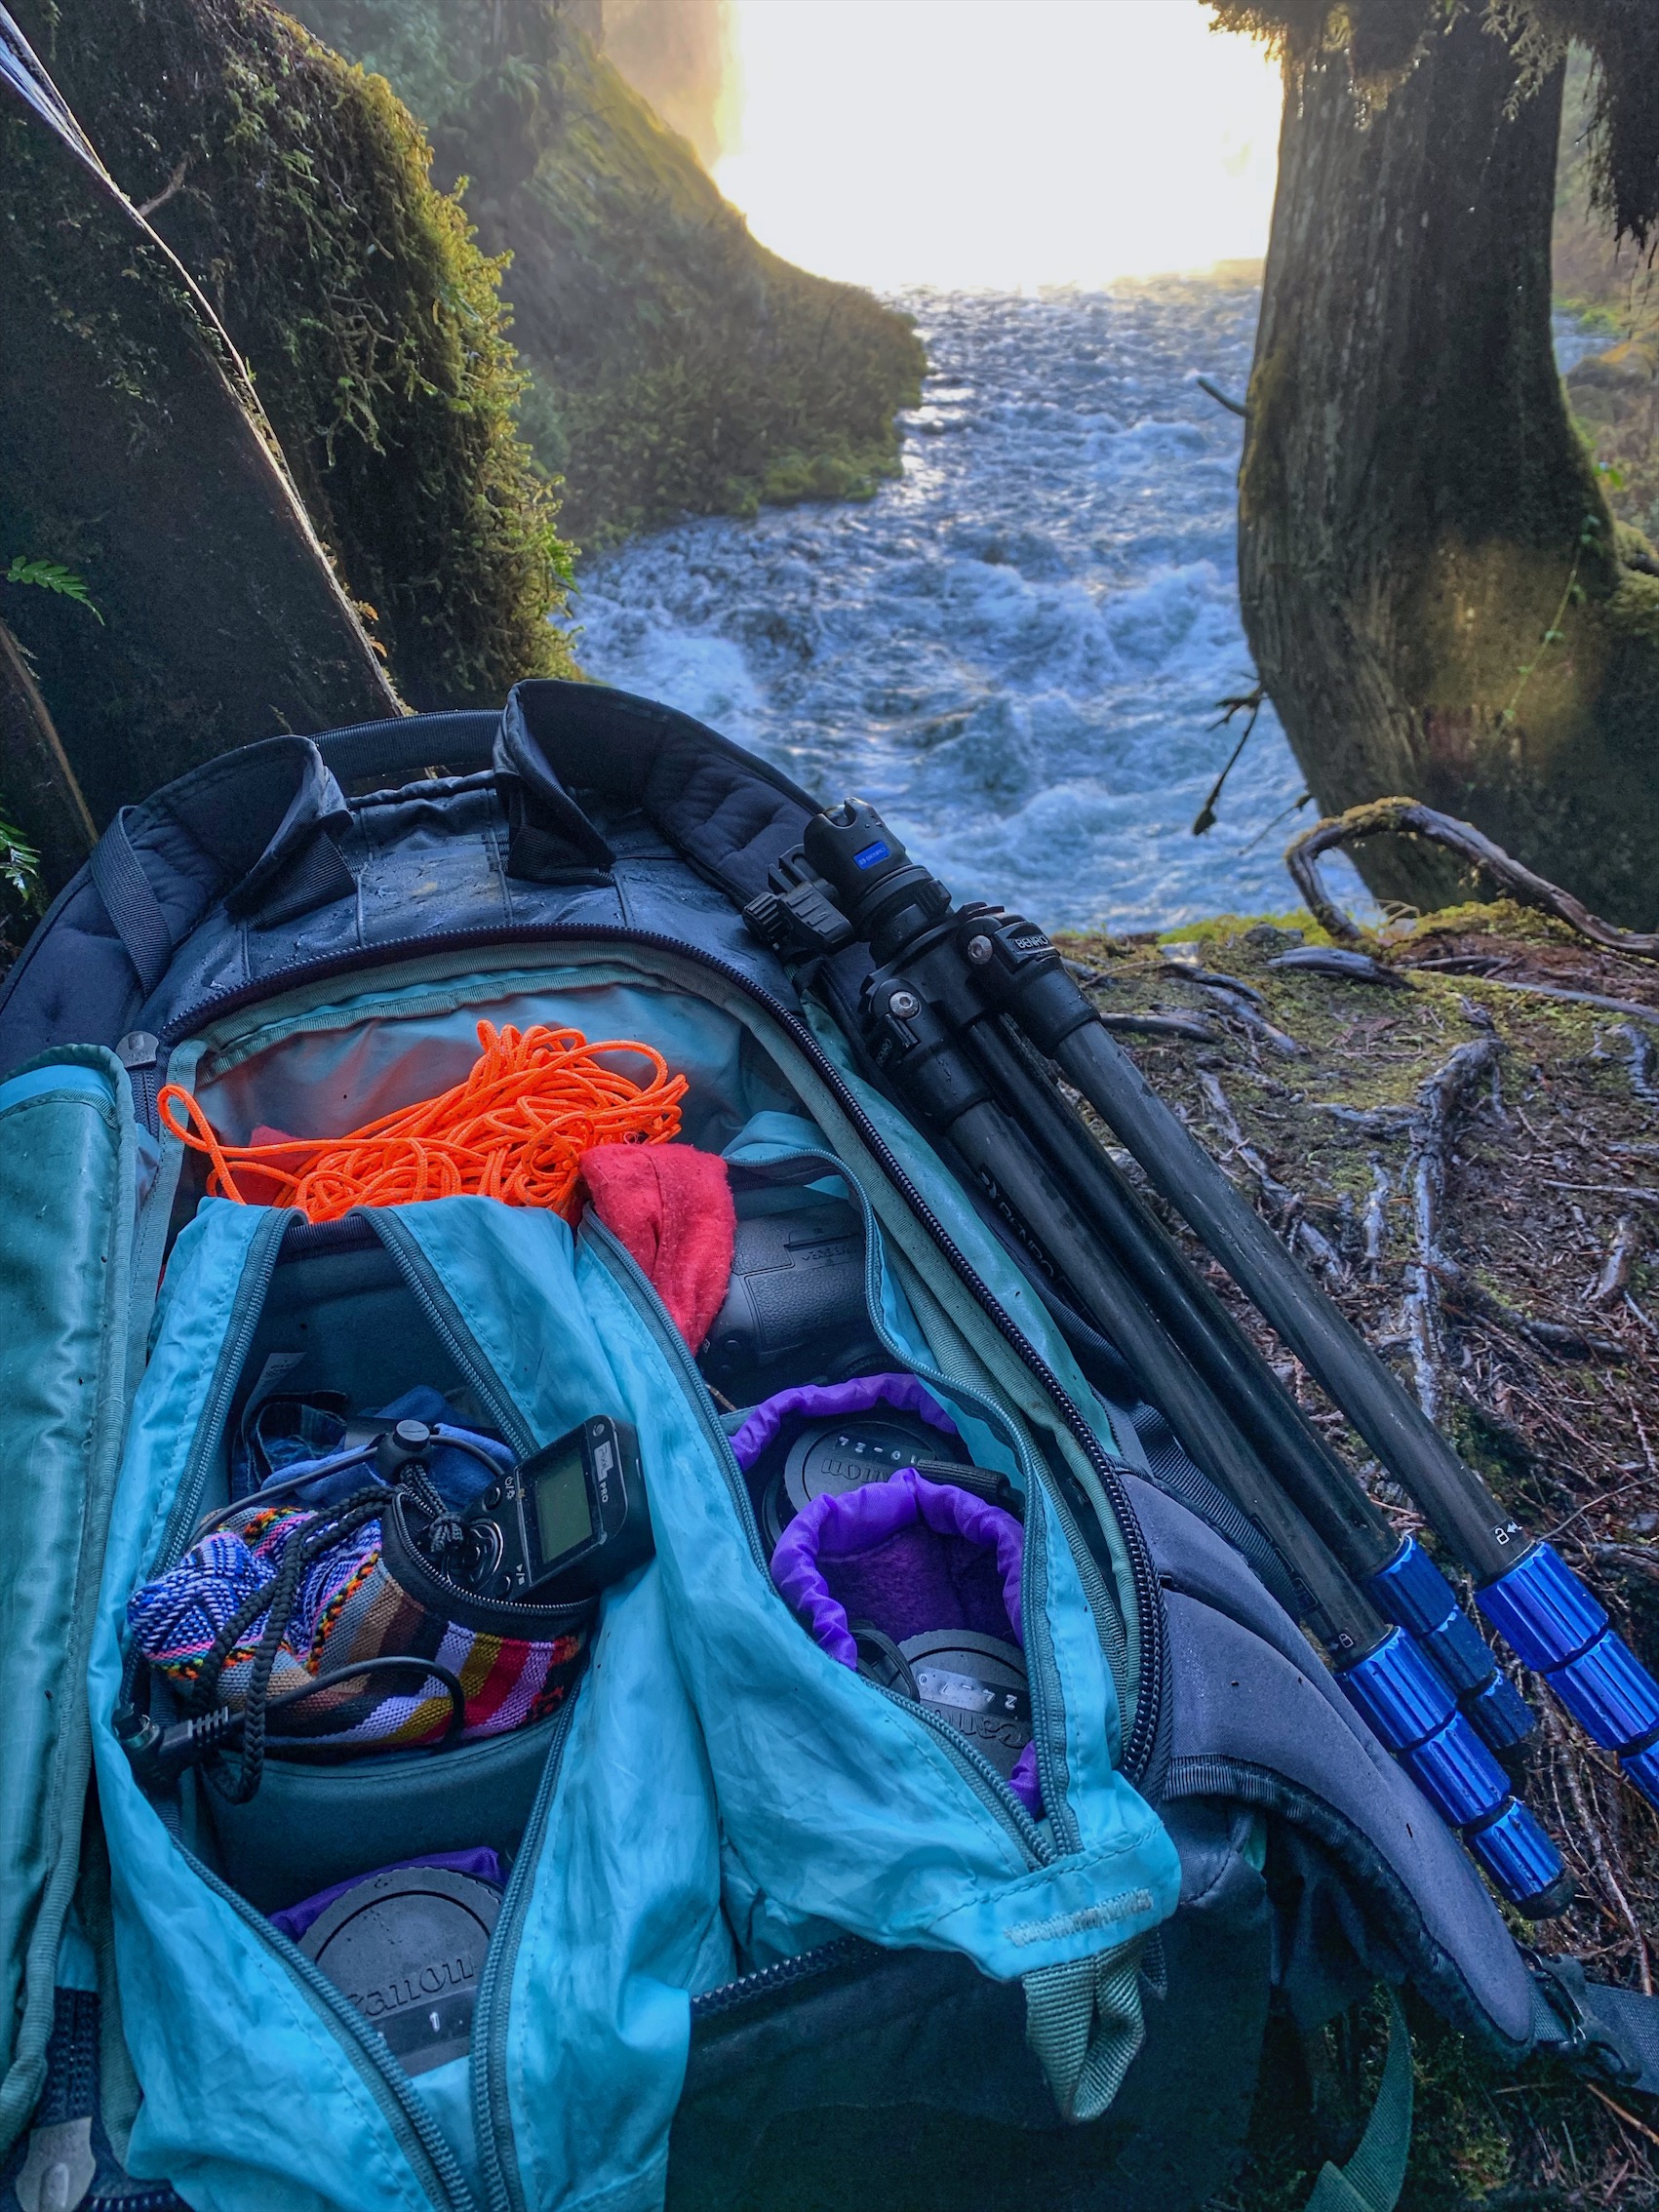
My accessories
When I visited Colorado last year and went backpacking for the first time, I bookmarked a ton of photos of places I was excited to see, so I was excited to go and take photos of it myself. I had high hopes for the photos, but when I saw them in post processing–I was really frustrated with how they turned out (turns out you can’t get away with shooting at the hip in landscape photography like you can in portrait photography!), so I did a lot of research and took some workshops to learn more about landscape photography before heading out to try it again. Below are the key accessories I feel have been crucial to getting the images I’ve been happiest with.
 Tripod

I no longer trust myself to take a photo at anything faster than 1/180 seconds, so I always bring my Benro carbon fiber slim tripod with me whenever I go anywhere with my camera. It’s crucial to a tripod to keep your camera still one if you plan to do night photography or focus stacking, and it’ll give you the edge if you want to make sure all the details in your landscape photos are sharp and on point.
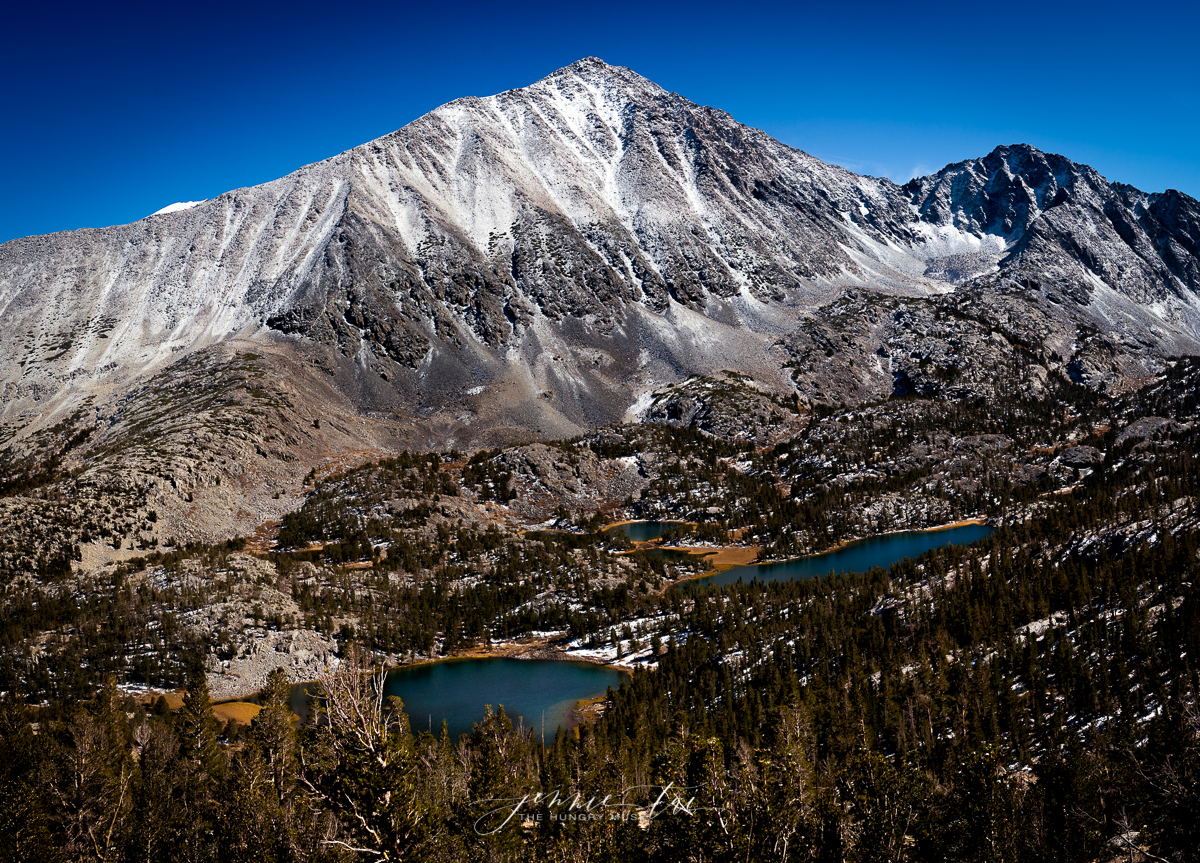
Polarizing Filter
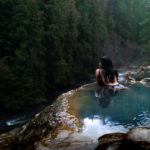
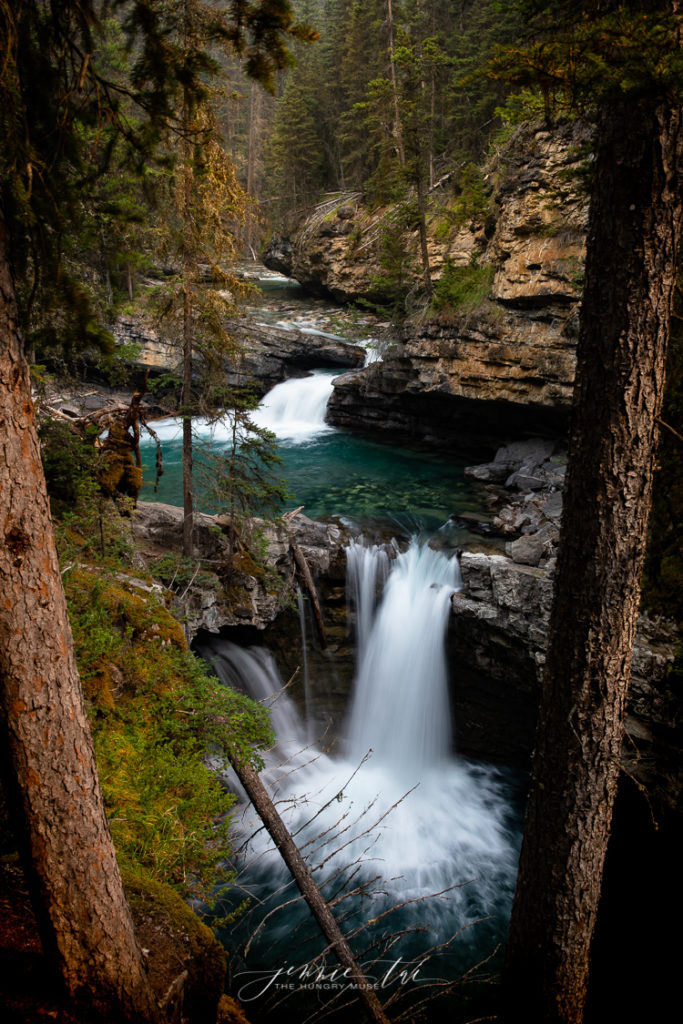
A polarizing filter is what cuts the harshness of bright lights on sunny days, which allows me to do long exposures to get milky-looking waterfalls during the day, (left photo) and brings out the mirror-like water reflections, colors and contrasting shades of light in all of my photos. It blew my mind when Cath Simard taught me how to use it, and now I make sure I have one that fits every lens I bring out with me. The one I like most is my Hoya HD3 Polarizer, but the denser the better.
Wireless shutter release
I love my PIXL FSK wireless shutter release so much (just remember to find the one that’s compatible with your camera). I hike alone a lot, so I don’t always have someone nearby to take photos of me. Sometimes I can get away with using Canon’s remote wifi app on my phone, but it loses connection when my phone and I are too far away from my camera. This wireless shutter remote lets you tune to a channel to take photos from a long distance (like across a lake) and is really helpful if you don’t want to be the primary subject of your photo, and you don’t want to do a long timelapse or have enough time to run to your spot.
Extra batteries & storage
My worst nightmare is running out of battery or space right when I get to that prime spot or moment to take a shot, so I bring a lot of extra batteries, SD cards and store them in protective cases (like this plastic Pelican case) to make sure they’re all safe.


Other essentials
I often hike alone to get to the things I want to photograph, so I always bring a few things to prepare for the worst case scenario. I know some people who will go as far as bringing a solo tent everywhere they go in case they get lost, but so far–this is all that occupies the rest of the space in my backpack for now.
GPS Beacon
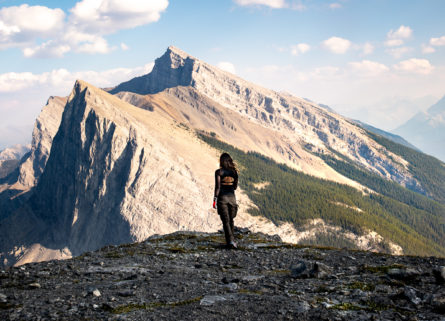
I almost used my Garmin InReach Explorer to call for help when my body started to give out trying to get down Mount Rundle, while I was out of service and the sun started to go down for the day. I ended up pushing through (mainly because I didn’t know how far I was from the parking lot and I thought it’d be really embarrassing to get helicoptered off hundreds of feet away from the trailhead (-_-)) but I still carry this everywhere in case I run into a worst situation and get completely lost alone.
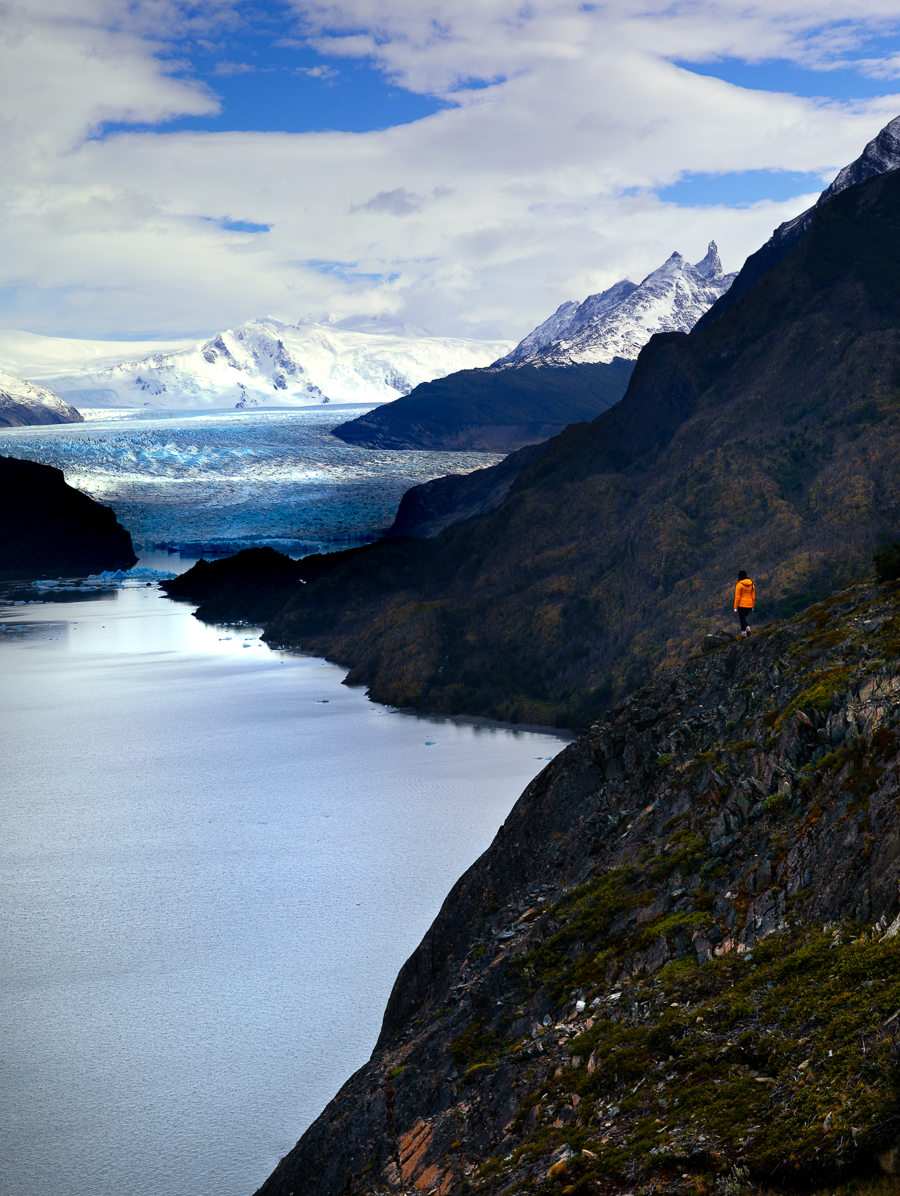
3mm Paracord
A standard “just-in-case” item that most backpackers bring on their hikes, I keep this in my bag all the time, and ended up using it to secure my tripod over a cliff in order to get my camera at the vantage point I wanted to achieve the shot above.
Headlamp
For night photography, and long day hikes where you could get caught in the dark; I use this to make sure I can see where I’m going but also to color in parts of my long exposures.
Microfiber quick dry towels
Another standard backpacking item, I use this most to wipe off the rain, waterfall spray and condensation from my lenses when I hike in wet areas.
What works for you?
Let me know in the comments! I’m always curious to know what has worked for other landscape photographers, and what they carry in their bag.
Hope this helps!
![The Pendulum’s Peak: Hiking Mount Rundle [Part I of II]](https://jennietai.com/wp-content/uploads/2018/09/20180813-4Z3A2866-5-150x150.jpg)